This is an excerpt from the Book called “Improvement and Renovation” by Bob Vila. Continue reading to learn more about Foundations To Support An Added Room, thanks to the author.
An addition that looks like a part of the original house plan rather than an afterthought begins with a foundation that is not only structurally sound but allows you to match the floor level in the house and to make seamless extension of a house wall, if you wish.
The problem of matching the floor levels is generally attacked by building the foundation of the addition flush with the top of the house foundation. You can compensate for slight differences in lumber dimensions or errors in building the foundation by shimming or notching floor framing members-or sleepers, in the case of a slab-to make the addition subflooring flush with that of the house.
If the addition will extend an interior wall of the house, you must place the foundation so that you can tie the addition wall to the end framing of the house wall. And where you are extending the façade of your house, the addition foundation generally should line up with the house foundation.
In a frame house finished with shingles, clapboards or metal siding, you can find the subfloor level, the top or side of the foundation, and the end framing of walls simply by removing a strip of siding and sheathing from the bottom of the wall as shown below, a step also necessary to install joists for the addition floor. You may also have to chip away some of the waterproofing mortar on many block foundations to place the addition building line flush with the house foundation.
Brick-veneer, solid-brick or block construction complicates the task of positioning the foundation. To mark the floor level or the end of an interior wall, for example, you must measure carefully inside the house from a door, a window or a pilot hole, then transfer the distances outside. The top of the new foundation is found by measuring down from floor level a distance equal to the total height of new-floor framing members. To find the foundation side of a brick-veneer house, you may have to dig below the brick.
What kind of foundation to build for the addition depends on the house foundation; consult a building designer or architect to design and draw the plans. If your house has a basement or crawl space, for example, build a crawl-space foundation for your addition as detailed on these and the following pages. If joists of your addition will span more than 15 feet, add piers for a girder. If your house rests on a slab, choose between two concrete-slab foundations. If the house slab rises no more than 12 inches above ground and if the footings of the new slab need to descend no deeper than 2 feet below grade to reach below the frost line, a turned-down slab is adequate. But if the slab must be built higher than 12 inches, or if unstable soil makes it difficult to dig the narrow trenches necessary to form the turned-down edge of the slab, build a combination slab-on-block foundation.

If the ground drops more than 24 inches from the house to the outer wall of the proposed addition, a crawl-space foundation will be the most economical choice, regardless of your house foundation. But if the land drops as much as 36 inches, you may need a stepped foundation, a complicated structure that requires considerable expertise to build.
After excavating a foundation that conforms to the local code, have the trenches checked by the building inspector. If your soil is wet or poorly compacted, more digging may be necessary to reach firm soil.
A Three-Sided Foundation
- Attaching The Marker Boards. After removing a strip of siding and sheathing about 15 inches high-or extending to at least 1 inch above the sole plate-between the corners of the addition, nail two 8-foot 1-by-4 marker boards that are shimmed to make up for missing siding, flush with the top of the house foundation. The boards should extend 3 1/2 feet inside the corners marked at the house. Center a nail in the top edge of each marker board at the corners.
If the addition will extend an interior house wall, position the nail 4 inches-8 inches if you are going to finish the addition with brick veneer-outside the inner edge of the tie-in stud. If you are extending an exterior wall, align the corner nail with the house foundation.
- Making The Addition Square. Lay out building lines using the 3-4-5 triangle method. To do this, drive a nail at the center of the marker-board edge, 3-feet from a corner nail. Have two helpers cross measuring tapes hooked to the two nails so that the 4-foot mark on the corner-nail tape meets the 5-foot mark on the other tape. Drive a 3-foot stake at this point, then drive a nail into the top of the stake. Position a similar stake opposite the other marker board.
Use a string to extend the line between the corner nails in the marker boards and the nails in the stakes. Drive stakes to mark the ends of the addition side walls. Measure the diagonals of the resulting rectangle; if they are not equal, move the end stakes to make them so.
3. Building And Marking Batter Boards. With a water level, mark the height of the house foundation on 2-by-4s driven to form right angles at the end stakes, 5 feet beyond the building lines. Then nail 1-by -6 batter boards, aligning the top edges with the marks. Stretch strings from the marker boards to extend the building lines to the batter boards. Drive nails in the boards to mark the lines. Drive nails into the batter boards and marker boards for the foundation wall and the footing trench and main trench, using the dimensions shown in the inset. (For brick veneer, drive the foundation-wall nails 11 5/8 inches inside the building lines.) Remove the end stakes and dig the trenches so that the bottom of the footing trench is below the frost line and the top lies a multiple of 8 inches below top of the house foundation.
- Leveling The Trench. In a level site, the new footings will be the same depth as old ones. After driving 1-by-2 stakes at the corners of the footing trench-and every 3 feet along it in a zigzag pattern, 3 inches from the sides-mark the top of the footing trench on one stake and transfer the mark to the other stake with a water level. Deepen the footing trench where marks are less than 8 inches from the bottom; do not fill in the trench where it is deeper than 8 inches.
Drive two 16-inch lengths of 1/2-inch reinforcing bar, called grade pegs, on each side of the trench adjacent to each corner stakes and tamp the dirt around each grade peg.
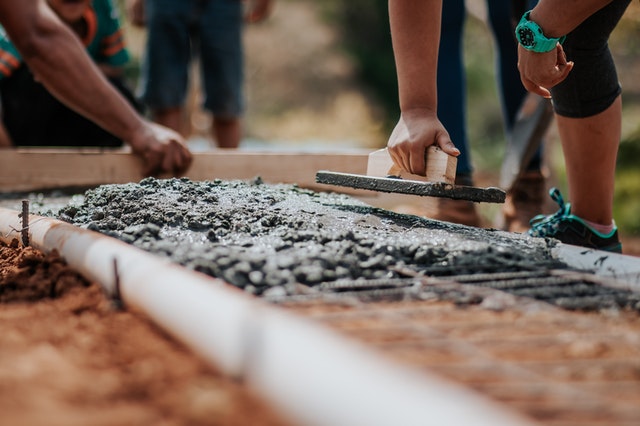
- Placing the footing. Place two lengths of No. 4 (1/2-inch) reinforcing bar on bricks in the footing trench and wire the bars to the grade pegs. Where two pieces of bar meet, overlap them 12 inches and wire them together with a tight double wrap of No. 16 mechanic’s wire at each end of the splice. Cast the footing so that the concrete comes to the tops of the grade pegs, roughen the top surface, and let the concrete cure under sheets of polyethylene for 24 hours.
Run taut strings between the building-line nails on the batter boards and marker boards; then transfer the lines to the footing with a plumb bob and chalk line. Now you can remove the strings, batter boards and marker boards.
- Beginning The Foundation Wall. Lay a dry run for the first course of the foundation, then lay stepped sets of 8-by-8-by-16-inch blocks three courses high as leads at the corners and ends of the foundation. Lay the block walls using a mason’s line as a guide. Place wire-mesh block reinforcement into the mortar bed of every third course of blocks.
On opposite sides of the addition, install two ventilators in place of foundation blocks in the middle of the wall. Pack mortar around the edges, sloping the bottom for drainage. In the next course, lay solid blocks over each vent.
If you intend to finish the addition with brick veneer, build the wall with 12-by-8-by-16-inch blocks to a point immediately below ground level, and complete the wall with 8-inch blocks laid flush with the inside of the foundation wall.
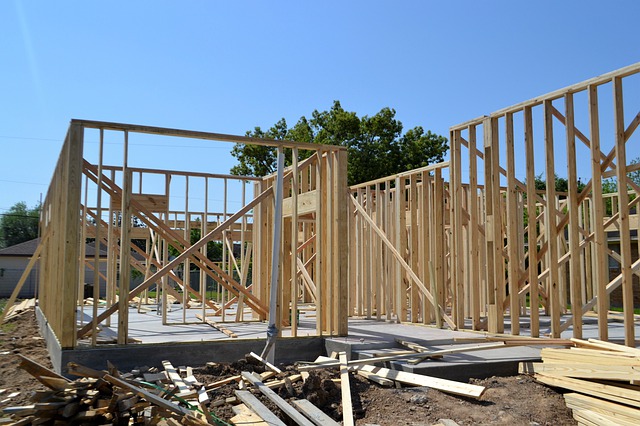
7. Setting Anchor Bolts. Lay mesh block reinforcement under the top course of the foundation, fill all the cores with mortar and, before the mortar sets, install anchor bolts for the sill place 1 foot from each corner and door-way and every 4 feet in between. Use 1/2-inch anchor bolts 8 inches long and position each with a piece of 2-by-6 that has a 5/8-inch hole drilled in the center. Insert the bolt in the hole, fit a washer and nut, then set the 2-by-6 back 1/2 inch from the outside of the foundation wall or, if you are extending an exterior wall, match the setback of the house sill plate. Tap the anchor bolt into the mortar as far as it will go. After 24 hours, remove the nuts and washers and lift the 2-by-6 jogs from the bolts.
- Installing The Sill Plate. Place atop the wall a pressure-treated 2-by-6 that is 1/2 inch shorter than a foundation side wall (measured from the house sill plate), and use a combination square to mark it with the anchor-bolt locations. Drill 3/4-inch holes centered at the marks.
Install a layer of sill sealer, available in rolls 6 inches wide, and bolt the sill plate on. Install the remaining sill plates in the same fashion, shim them level and check them for square-ness, then toenail the ends together.
Tyling The New Floor To The Old
- Installing Header And Stringer Joists. Cut a heard joist equal to the distance between the outside edges of the side-wall sill plates and fasten it to the exposed joist on the house, using 1/2 inch lag bolts 4 inches long and 16 inches apart in a zigzag pattern, starting 2 inches from one end of the joist. Do not bolt a joist to brick veneer; toenail it to the sill plates at each end.
Toenail two stringer joists 3 inches shorter than the side-wall sill plates to the heard joist. Butt-nail another header joist to the stringer joists and toenail all three to the sill plates.
- Securing Floor Joists And Subfloor. Install joists the same size as those on the house every 16 inches, butt-nailing them to the sill joists where possible or using joist hangers or anchors. Face-nail and toenail blocking between joists every 4 feet.
After filling the trenches inside the walls, cover the earth within a crawl space with 6-mil polyethylene sheeting weighted down with rocks as a vapor barrier. Staple insulation between the joists, vapor barrier side up, then install subflooring, leaving an area in the center of the floor temporarily uninsulated and uncovered for access to the crawl space for the utility work. Waterproof the outside of the foundation with a 1/2-inch layer of mortar up to grade level-or higher, to match your house.
Precision Fitting For A Concrete Slab
A Slab Foundation. Some slabs rest on a block wall and footings identical to those built for a crawl-space foundation (Steps 1-6, pages 413-415), except that air vents are omitted and the final course of the wall is laid with L-shaped header blocks to form a shelf. The area between the foundation walls is filled with compacted gravel to the level of the slab shelf, the gravel is covered with 6-mill polyethylene, and expansion-joint material is placed along the house.
The other three sides of the slab, and part of the bottom, are insulated with rigid styrofoam insulation. Wire mesh reinforces the slab. Sole plates are attached with anchor bolts set into mortar-filled cores of the blocks. In warm climates the block foundation shown here can be omitted. Instead, use simple forms and footing trenches to shape the concrete placed for the slab into turned-down edges that will serve as both footing and foundation. Reinforcing bars strengthen the edge of the foundation, mesh strengthens the slab itself. Anchor bolts for sole plates are set into the wet concrete.
