This is an excerpt from the Book called “Estimating Rehab costs” by J Scott . Continue reading to learn more about Electrical, thanks to the author.
Electrical Overview
When you’re first starting out, the electrical system of a house can appear to be a complicated and daunting. May goal in this section is to break down the electrical system into its basic components and provide enough detail so that you will have the ability to evaluate those components when creating you SOW and rehab estimate. I’ll try not to go into so much detail to put you to sleep while reading.
One word of caution before I continue—electricity is dangerous and many of the electrical components of a house can be deadly if handled improperly. I highly recommended that you don’t handle any electrical components in your property if you’re not properly trained and understand the risks associated with your actions.
With that disclaimer out of the way, I like to think about it in terms of four basic components to home electrical system:
- Service and meter
- Circuit breaker panel or fuse box
- Rough wiring
- Finish electrical
The Service and Meter
The electricity in a house is supplied by cables coming to the home either overhead or under the ground. Electrical service is measured in term of voltage (volts) and amperes (amps); if you think of electricity running through a wire as analogous to water running through a pipe, the voltage is analogous to the amount of the pressure pushing the water through the pipe and the amperes are analogous to the volume of water flowing through the pipe.
In almost all circumstances, the voltage entering a modern house is 240 volts
(even though most electrical outlets are 120 V outlets) and is provided through three wires coming to the service panel or electrical meter. In some older homes, only two wires are used, bringing in 120 volts. Older, 120-vlot service is not powerful enough for most modern-day home needs, and if you ever encounter 120-vlot service, you should speak with the local electricity company and a qualified electrician to get the service updated.
The “size” of the electrical service coming into a house in measure in terms of number of amps, with is going to be directly related to the physical size of the wires coming from the electrical cables at the street and into the home—larger wires carry more current. Typical service sizes include 30-amp. 60-amp, 100 amp, and 200-amp, with some areas using other intermediate sizes (125-amp and 150, for example)
Generally speaking, larger service sizes will allow the homeowner to run more and large appliances simultaneously, without blowing a fuse or tripping a circuit breaker.
Both 30-and 60-amp service are generally considered too small for most modern homes, as central electric air conditioning and some larger house with standard appliances, 100-amp service. For typical 3-bedroom house with standard appliances, 100-amp service is most common.
In larger single-family homes and multi-family properties, 200-amp service is typical. Heat pumps (central electric heating) will generally require their own 100-amp service, with the other 100-amp service used for the rest of the household electrical needs.
When an electrician or contractor refers to “upgrading the service,” they are referring to upgrading the size of the service, which involves bringing in larger wires from the electrical cables at the street and potentially upgrading the electrical service in particular house, look at the circuit breaker or fuse box, which is the next piece of the electrical puzzle.
The Circuit Breaker of Fuse Box
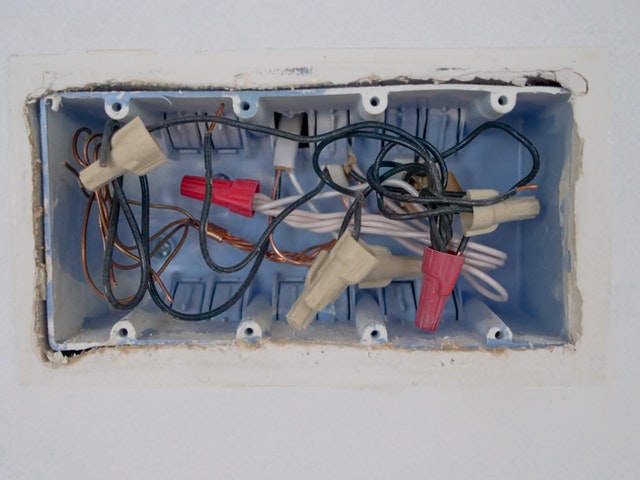
While you may have 100-or 200-amp electrical service coming into the house, most electrical appliances don’t require that much amperage in order to operate, and putting high-amp wires (which are larger than lower-amp wires) throughout the house is cumbersome, expensive, and dangerous. This is why a household electrical system brings the main service into the house and then distributes that electrical service through the house via smaller lines called circuits. These are the lines that run to each of the outlets in the house.
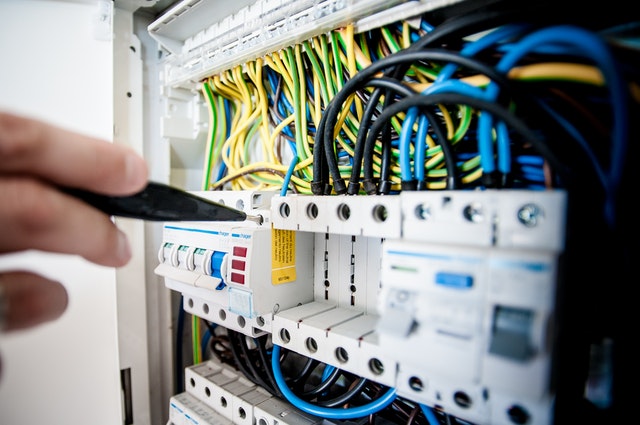
A fuse box (in older homes) or a circuit breaker panel (in modern homes (is where the main electrical service will be divide into many individual circuits. Circuits will typically range in size from 15 amps to 40 amps, with some larger appliances requiring circuits up to 100 amps in size. Different sized circuits will use different sized wires.
Each circuit attaches to a fuse (if a fuse box is used) or circuit breaker electricity to that circuit if the amount of electricity suddenly exceeds the designated circuit size. this can happen when an appliance has a short circuit, for example; by having a fuse or circuit breaker instantly stop the flow of electricity, the appliance won’t overheat, start a fire, and burn down the house.
Depending on the size of the circuit and the layout of the house, each circuit will service a particular part of the house, a particular set of outlets, or a particular appliance. If a fuse box or circuit breaker is not rated to support the size of the circuit coming into the house or if the panel isn’t physically large enough to support the number of needed circuits, you may have to upgrade the panel and all of the fuses or breakers. And if you’re working with a home that has an old fuse box, you may seriously want to consider upgrading to a circuit breaker panel instead.
The Rough wiring
The rough wiring includes the electrical lines that run from the fuse box or circuit breaker through the walls and to the individual outlets in the house. This wiring is originally run prior to sheetrock going up, but in cases where you are adding a new circuit in an existing property (or even upgrading all the electrical circuits), you may find that you’ll need to run wires through an otherwise finished house.
Obviously, running new wires where there is already sheetrock will be more time-consuming and expensive than running wires where there is no sheetrock; additionally, running new wires behind existing sheet-rock will result in some minor (if you’re lucky) sheetrock damage that will need to be repaired. Keep that in mind when we get to the pricing part of this chapter.
Each circuit will terminate at one or more electrical wall outlets or appliance hook-ups, and if you’re finishing a room or adding a new space, you’ll likely need at least one or two new circuits to feed the outlets, switches, and lights—or fans in that room. If you are just looking to add a new outlet or two in an existing room, you electrician may be able to wire the new outlets using the existing circuit (just wiring from an existing outlet to the existing circuit (just wiring from an existing outlet to the new location), which will generally be a little bit easier and cheaper.
As long as I am discussing electrical outlets, I should discuss those old two-prong outlets that were common in houses prior to the 1980s. These outlets have since been replaced with three-prong outlets that support newer appliances that have three-prong plugs. The third prong on the plug is a grounding line and provides some additional protection to appliances to ensure that they don’t short circuit or start a fire. The third prong on the outlet should attach to a grounding wire that runs from the outlet back to the circuit breaker panel and is then grounded at the metal part of the plumbing system or attached to a grounding rod.
Note that a three-pronged plug will not provide any additional protection when plugged into a three-prong outlet unless the third prong of that outlet is actually attached to a grounding wire. Replacing a two-prong outlet with a three-prong outlet without adding a ground wire will only provide a false sense of protection, and a home inspector will almost certainly find the discrepancy on a typical home inspection.
The other special types of outlets I should mention are called ground-fault interrupter (GFI or GFCI) and arc-fault circuit interrupter (AFCI).
GFCIs are relatively new types of outlets a that are very sensitive to even minute differences in electrical current going into and out of the outlet, and when a GFCI detects a current difference, it will immediately interrupt the circuit. GFCIs are now required in all new wiring in kitchens and baths, as water poses an increased risk of accidental electrocution, and GFCI unit will protect against these types of accidents. The special circuitry can be added either to the breaker or to the outlet.
AFCI is a special circuit breaker designed to prevent fires by detecting unintended electrical arcs and disconnecting the power before a fire starts. AFCI is required in bedrooms and basements by most building authorities. The circuitry is added to the circuit breakers and can be relatively expensive (about $30 per breaker) compared to typical circuit breakers.
These first three electrical components—the service and meter, the circuit breaker panel or fuse box, and the rough wiring—are referred to as the “rough electrical” components of the house, with the “finish electrical” being the piece we discuss next.
The Finish Electrical
The finish electrical components consist of all of the electrical components that are visible throughout the house. This includes the lights, fans, outlets and switches, as well as things like the garbage disposal hook-up and bath fan hook-ups.
Replacing finish electrical components doesn’t generally require an electrician; a good handyman can generally complete any finish electrical tasks without a problem. That said, when any of your contractors are dealing with electrical components, you probably want to ensure that their insurance is up to date, as even a small mistake when dealing with electrical tasks can result in serious injury. For this reason, I will use a licensed electrician, even for finish electrical tasks—the extra cost is worth it to me in terms of reduced risk and liability.
Inspection Tips
One of the most important aspects of an electrical inspection is verifying the condition of the fuse box or circuit panel. But because of the real risk o injury or death from live electrical circuit, I never recommend that you remove the cover from your panel.
In any house you’re seriously considering purchasing, you should bring in a qualified electrical contractor or inspector to inspect the fuse box or circuit panel. He can verify that the size of the panel is reasonable for the house, that the panel is wired correctly, and that the components are in working order. It’s expensive to upgrade electrical service, so having a qualified contractor or inspector verify these things will help eliminate any major surprises in the budget later in the project.
With that in mind, there are some aspects of the electrical system you can—and should—test your self during a walkthrough of the property:
- Check every electrical fixture, including lights, fans, and appliances. Even if you plan to change out these fixtures, this should give you an idea of whether is potential wiring issues throughout the house.
- Purchase an outlet tester at your local Home Depot or Lowe’s. These devices are inexpensive—under $10—and can be used to verify that outlets throughout the house are wired correctly. You don’t need to test every outlet, but you should test a representative sample. If many of the outlets in the house are mis-wired, this can be an indication that there are other electrical issues throughout the house.
- One specific thing to note when testing outlets is whether the three pronged outlets are grounded correctly. In older houses with original wiring and two-pronged outlets, there was no ground wire run to the outlets. In some cases, homeowners upgrade to three-pronged outlets, but the ground wire wasn’t added. This can be a safety hazard and will be flagged by your buyer’s inspector and perhaps his lender as well.
- If you plan to do major electrical upgrades, note whether there are GFCI outlets in the kitchens and bathrooms. When you pull permits to upgrade other parts of the electrical system in the house, your building inspector will most likely require the kitchen and bathroom outlets to be upgraded to GFCI at the same time.
Life Expectancy
Each electrical component will have its own life expectancy. The service meter, fuse box, or circuit breaker panel and rough wiring can easily last decades; it is the finish electrical components that are susceptible to the most wear and tear and will deteriorate the fastest. In addition, lights and fans tend to be taste-specific, and as tastes change, these quickly go out of style.
Scope of Work (SOW) Tasks
If you’re doing more than just replacing lights and fans, you’ll most likely be bundling together a whole bunch of electrician to take care of at once. For example, if you’re upgrading your service, you’ll likely also be upgrading your panel and replacing all the circuit breakers. If you’re adding an outlet or appliance to hook up to the circuit. For this reason, your electrician might describe the work in more or fewer steps. But, in general, here are the electrical tasks that are most common on houses you’ll be renovating:
Service call
Any time an electrician visits your property, he will charge a minimum fee for his time and expertise. This minimum is generally referred to as a “service fee” or “service call fee.”
Upgrade Service
If you don’t have at least 100-amp service, you should seriously consider upgrading your electrical service to either 100 or 200 amps, depending on the size of the house and the appliances that will be run.
Replace Circuit Panel
If your circuit breaker panel doesn’t support the size of the service you have (or are upgrading to) or if the panel doesn’t have enough physical space to support all the circuits you’ll need to upgrade the panel or add a second panel.
Rewire House
Rewiring an entire house is a significant undertaking and the actual amount of work involved will depend on many factors, including:
- Size of house.
- Number of levels or floors in the house.
- Sheetrock or no sheetrock on walls.
- Number of outlets, switches, and boxes.
- Location of the panel.
Rewiring a single-story house that is torn down to the studs (no sheetrock) could cost substantially less than rewiring the same square footage house that is multiple stories, with sheetrock in place.
I can provide some very general guidelines for cost, but ultimately, you’ll need to get a qualified electrician onsite to look at the job and give you a firm bid.
Add New Circuit
If you’ll be finishing a room or adding new electrical service to a part of the house that doesn’t currently have electrical service, you’ll need to add one or more circuits from the panel.
Add New Outlet or Box
A new outlet or appliance box can be added to an existing circuit by wiring from another outlet in the vicinity, or it can wired from a new circuit run from the circuit box. Either way, there is cost to cut the drywall opening, add the electrical box, and wire the receptacle (if adding an outlet).
Upgrade Outlet to GFCI
If you’ll be doing permitted electrical work, the building inspector will likely require all kitchen and bathroom outlets to be upgraded to GFCI outlets. Even if you don’t pull permits or if the inspector doesn’t require it, it’s a good upgrade to perform for your buyers.
Add New Switch
If you’re adding a new light or fan, you may need to add one or more switches. The wiring for the switches will run from the location of the switch to the location of the appliance being controlled and may involve cutting drywall to run the lines.
Install Can Light
The cost of installing a new ceiling can light will generally include the wiring from an existing circuit, installation of the rough electrical, installation of the can, and then finishing trim to make the can light look good. Remember, with most new can light installations, you’ll generally need at least one new switch.
Install Light
This may involve replacing an existing light or installing a light at a newly installed electrical box.
Install Fan
This may involve replacing an existing fan or installing a fan at a newly installed electrical box.
Replace Outlets and Switches
For many of your rehabs, you’ll see that the outlets and switches are old and grungy, and it’s easier to just replace the receptacle (the actual physical outlet piece) or switch as opposed to trying to clean them.
Cost Guidelines
You may find that if you’re doing a lot of electrical work, some of the costs may overlap into more than one area (to reduce the overall cost) or may make it look like one task is more expensive while another task is less expensive. Also, keep in mind that most electricians will charge based on the amount of time they spend, and will have a minimum charge based on at least one hour of work. Since most electricians will charge between $60 and $100 an hour, this is generally the minimum charge. Also note that the prices below may or may not include the cost of obtaining permits. In areas where permits are especially expensive, electricians may pass the actual cost of the permit onto the investor
Service Call
$60-$100.
If you have an electrician visit your property for any reason, expect to pay for a service call, which typically amounts to the cost of an hour of the electrician’s time. So, even if the work you need done only requires ten minutes of work and no materials, you should still expect to pay this minimum fee.
Upgrade Service
$1,200-$2,500.
This includes upgrading the service to 100 or 200 amps from existing 60-amp service or less. This is a labor and materials price that includes cost of the new meter, the service cable, grounding rods, a new circuit panel (which will almost always be required), and the circuit breakers for the new panel.
The actual price will be determined by the hourly cost of the electrician, availability of the incoming service wire, and the types of breakers required—some parts of the house may require AFCI breakers, which are relatively expensive.
If the circumstances aren’t ideal—for example, if the incoming electrical service isn’t located anywhere near where the circuit panel is located—the cost can be significantly higher. But an electrician will tell you if and why circumstances warrant a much higher cost.
Replace Circuit Panel
This price includes the cost of the new panel (generally between $200-$300), all the new breakers (between $6-$30 each), and the labor involved. If you’re upgrading the entire service, this cost should be included in the overall price of the service upgrade.
Generally, you’ll just be upgrading a panel when the existing panel is undersized (not rated for the size of the service you have) or when the panel is physically too small to support the number of circuits/breakers you need.
Note that adding many AFCI breakers will increase your cost. And, in general, the more breakers you have higher the cost will be.
Rewire House
$50-$100 per outlet, switch, or fixture.
The actual cost of the rewire is going to be highly dependent on the configuration of the house and whether there is sheetrock in the house or not.
This cost does not include the cost of upgrading the service or installing a new circuit panel. (The new panel will likely be required when rewiring.)
For a typical single-story, 3-bedroom, 2-bath house, expects a total rewire to cost in the ballpark of $5,000-$8,000. For larger houses, $10,000-$20,000 is fairly common.
Add new circuit
$125-250 each.
The actual cost will depend on the type of breaker that is required (arc fault breakers are often required in bedrooms and basements and can cost up to $30 each) and the length and complexity of the wire run. If you’re running wire a short distance from the panel to the location of the outlet or box, the price will be less; if the run is longer, and if the electrician needs to fish the wire through sheetrock and hard-to-reach places, the cost will be more. The cost includes labor and materials including the electrical box—and if the circuit is for an outlet, the actual outlet and the cover plate. Note that GFCI outlets will add $20-$30 to the cost.
Add New Outlet
$60-$100 each.
If you want to add a new outlet to an existing circuit (meaning there are likely other are likely other outlets nearby), the time and effort to add a new outlet is considerably less than adding a whole new circuit. The cost includes labor and the materials, including the electrical box, the outlet itself, and the cover plate.
Note that adding GFCI outlets will add $20-$30 to the cost.
Upgrade Outlet to GFCI
$30-$50 each.
The cost of a GFCI outlet itself can range from $10-$20, so a decent portion of this cost is materials alone. While it’s just as easy to have your electrician do this work if he is doing other work in the house, a qualified handyman can probably accomplish this task for less money in about the same amount of time.
Add New Switch
$100-$150 each.
This cost assumes that the appliance or outlet being controlled is already installed and is relatively close to the switch location. The cost includes labor and the materials, including the electrical box, the switch itself, and the cover plate.
Install can Light
$60-$100 each.
With can lighting, I will generally allow the electrical contractor to provide all materials in addition to the labor. If a new circuit is needed, that will add to the cost, and you should generally factor in the cost of a new switch as well.
Install light
Labor: $30-$60.
Materials: $10 and up.
Install Fan
Labor: $40-$70.
Materials: $20 and up.
Replace Outlet or Switch
$5-$10 each.
This price is normally associated with replacing all (or many) outlets and switches throughout a house and including both the labor and the cost of the outlet or switch and the cover plate. Personally, I prefer to have my electrician (or handyman) charge me an hourly rate to replace outlets and switches, as it’s normally cheaper this way.
Determining Your Local Prices
Many electricians will be willing to give you a ballpark figure for each of these tasks over the phone, though for more complex tasks (like upgrading the service or replacing the panel), the electrician will likely want to see the job before providing a price. My recommendation is to ask the cost of replacing a light or fan to gauge the price range of the electrician, and if the electrician is competitive on those prices, you can move onto the more complex task pricing when getting bids on an actual job. Keep in mind that most licensed electricians will be accustomed to doing retail jobs, and will typically charge by the hour, not the task. You may be well served to explain to the electrician your business model and see if they are willing to give you fixed pricing for the common tasks you’ll be asking them to do, such as installing lights and fans.
Electricians tend to be more expensive than most contractors—they will have more formal education, more insurance, and are in a higher-risk profession than most other contractors—so pricing will often be much higher than having unlicensed handymen complete the work. It’s up to you which way to go, but again, I highly recommend that anyone who is working on electrical tasks in your property have appropriate licensing and insurance. Improperly installed wiring can burn down your house. Saving a few bucks on a dubious electrician is never worth it.
How to Pay for the Job
A licensed electrician will typically not require much, if any, of an upfront payment, especially for small jobs. But for large projects that will take place over the course of several weeks—for example, when the electrician has both rough and finish work to do at different phases of the project—the electrician may want payment in several draws.
