This is an excerpt from the Book called “Tiny House Design & Construction Guide“ by Dan Louche. Continue reading to learn more about Tiny House Roofing, thanks to the author.
Roof Framing
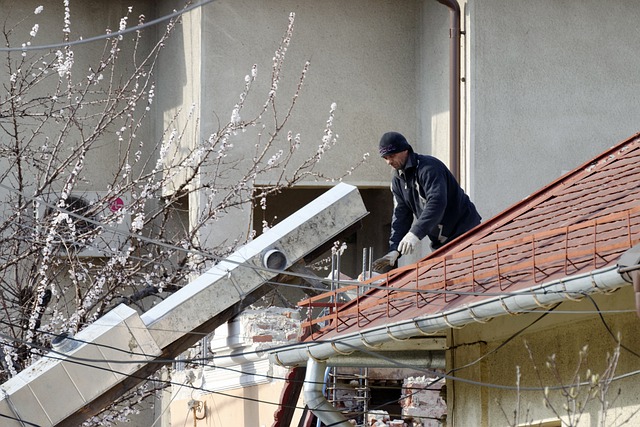
Framing the roof is more challenging than framing the walls, since much of the work needs to be done on a ladder
Before beginning work on the roof, the walls should be braced to ensure that they do not push out while installing the rafters. Brace the walls by screwing a small section of 2×4 to the floor about 2 feet from the wall and lined up with a stud.

Next, attach a longer piece of 2×4 to the floor piece and then to the corresponding stud. As the bracing is attached to the stud the wall should be made level and straight. This should be repeated very 4 to 6 feet along the length of the house. The walls can also be braced to each other by nailing a board across the top plates of the walls, ensuring they do not spread part. Be sure not to place this support where the rafters will be located.
The next step is to cut the rafters. Before cutting all of the rafters for the entire roof, double check your cuts and angles on just a few pieces. A quick check can be accomplished by holding two rafters in place, either on the top plate or someplace similar like the sill plate of two adjacent windows (if your design has two windows of equal height across from each other).
Mark both sides of the ridge board for the rafter locations. The ridge board should then be lifted up into place and the rafters nailed to both it and the top plate of the walls. While nailing the rafters into place, it will be necessary to either have multiple people hold the ridge board or to use a temporary support.
In order to accommodate the length of most tiny houses, the ridge board will likely need to be two pieces of wood that will be joined together by a third, shorter, piece called a scab. If a solid piece can be used, it is preferred.
Assuming that the walls arte level and evenly spaced across the entire length of the trailer, and that the rafters are all cut to the same size, each rafter should meet up with the ridge board at the same place. Since the ridge board is such a long piece of wood, it will likely not be perfectly straight. You should move it into the correct position, as needed, to consistently line up with each rafter, instead of cutting the rafters to fit. The point is to not let a curved piece of wood determine your ridge.


Note: A technique often used by contractors, especially when working with angled pieces of wood like those found around the roof, is scribing. When there is a piece of wood that needs like those found around the roof, is scribing. When there is a piece of wood that needs to have an angled cut, it can often be difficult to replicate that angle in order to cut it to fit. Scribing is when you hold as piece of wood as close as possible to where it needs to go, and then you trace the angle or pattern that you need to cut into the wood. A special tool is available to aid with scribing, called a scribing or marking gauge, but for most of my cuts I am able to use my hand to get good enough results.
An internet search for “Scribe technique” can provide additional details.
Roof Sheathing
The roof sheathing is installed very similarly to the wall sheathing
Like the wall sheathing, the roof sheathing material is 15/ 32 inch plywood and is attached with construction adhesive and 2 inch exterior screws. If the rafters are 24 inches apart, plywood clips, also known as H clips, should be placed between the horizontal seams of any two adjoining sheets and centered in the area between the rafters. The grains of the plywood sheets should be perpendicular to the rafters for strength, with the long side of the sheet parallel to the ground. Stagger the seams so that a lower sheet’s seam does not line up with any adjoining upper sheet’s seam on the same rafter.
Install temporary blocks along the bottom edge of the roof to prevent the plywood sheets from sliding off while you are putting them in place. These also ensure that the plywood will be even with the bottom edge of the roof. Blocks can be made of scrap material, including small pieces of plywood or 2x4s. They should only extend above the edge of the roof about one to two inches; otherwise, they may get in the way and make it more difficult to lift the sheathing into place. Cut a sheet of plywood to the size required and mark the rafter locations to assist with screw placement later. Apply construction adhesive on the rafters that the sheathing will lay on and put the sheet in place. If construction adhesive gets on any part of a rafter that will not get covered by sheathing in a relatively short period of time, be sure to clean it off before it hardens. Removing hardened adhesive is considerably more difficult than removing it when it is fresh and wet.
If working alone, consider using smaller pieces of sheathing. Smaller pieces will often result in m re waste, but are also a lot easier and safer to move, especially while on a ladder.
A technique to get larger pieces of sheathing up on a roof is to use an extension ladder. The ladder is positioned to lean against the roof at a relatively gentle angle. The sheathing is centered at the bottom of the ladder and slid up as you walk up the ladder behind it. The sheathing is pushed up until it slides off the top of the ladder and on the rafters. If this technique is used, cars should be taken so that the base of the ladder does not lift off of the ground when the sheathing gets to the top, as this can result in the ladder sliding sand falling.
Once the sheet is in the proper location, attach it with 2 inch exterior screws. On the outside edges, the screws should be approximately 6 inches apart. On the inside rafters, they should be 12 inches apart. Offset the screws along the seams of adjoining pieces of sheathing.