Before starting a painting process the first thing is to pull out the important things and make a quick covering with sheets for all the objects and furnitures in home, to avoid from the paint drops that might fall on them. To know more about before you start painting your home an author “Francis Donegan” makes an explicit explanation about “Painting Cleanup, Care, and Maintenance” in an article from the book “Paint Your Home“.
Cleaning and storing equipment and materials properly is an important part of a paint job. If you have brought quality tools, following the cleanup procedures outlined in this chapter will help to prolong their life. You will also learn how to dispose of hazardous materials and to safely store paints and solvents for use on another paint job.
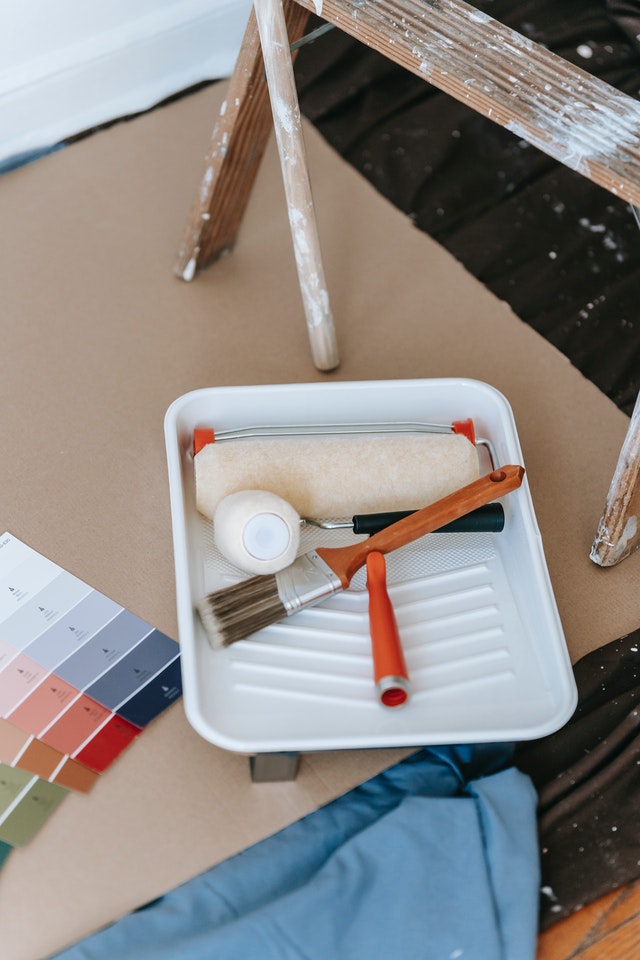
Cleaning up
The steps you take for cleaning up will depend on which stage of the painting project you have reached. The procedure for cleaning tools each day during a paint job is not the same as that for cleaning up after you have completed the work.
During a painting project
If you plan on continuing work the next day, there is no reason to store materials and tools. Just make sure that you pour the paint from paint buckets and roller trays back into the can. Then replace the lid and put the paint can out of the reach of children but close to where you will be working the next day. If you plan to use the room before resuming painting, roll up the drop cloths because they will be pushed out of position by normal foot traffic. But don’t bother to remove painter’s tape from windows and woodwork. Place brushes and rollers in plastic bags overnight. The aim is to keep your equipment in a convenient place and to leave the room ready for you to begin work without spending a long time setting up.
After a painting project
If you have finished the project, cleanup should be much more thorough, and this final procedure is described in this chapter. An important part of the final cleanup involves putting the room back in order. Replaces switch and electrical-outlet plates as well as light fixtures. Also, remove any painter’s tape that is still in place. If you used water-based paint, it should be dry enough within a day of painting for you to remove the tape from window glass. For all clean-up, it’s best to work at a large sink in the utility room. If you don’t have a large sink, use a large bucket. After you have removed paint from brushes and rollers, allow the water to run for a few minutes to clear the drain of paint.
Cleaning and storing brushes
With proper maintenance, a good-quality brush will last for yerars. The secret is to make sure that you remove all the paint from it after use. Start cleaning by running the brush across an old newspaper. This will remove much of the paint. For water-based paints, this means holding the brush under a stream of running water. Use mineral spirits as the solvent for oil-based paints. Help the solvent to reach deep into the bristles by flexing the bristles so that they fan out. Then dry the brush thoroughly and wrap the bristles before storing the brush. For long-term storage, hang the brush up so that the bristles do not support its weight.

Cleaning and storing roller covers
A roller cover can soak up a lot of paint during the course of a project. Not only will the cover become saturated, but paint always seems to work its way inside the roller sleeve. To clean a roller cover, you will need to use a mineral-spirit solvent to remove oil-based paint. You may be able to remove water-based paint from a roller with your hand while holding the cover under running water.
Cleaning and drying brushes
1. Remove the paint
Pour the correct solvent into a clean bucket. Wear gloves to put the brush in the solvent and rub the paint off the bristles; you may need a brush-cleaning comb. Dip a rag in the solvent and remove paint from the handle and ferrule of the brush.
2. Dry the brush
Wipe the cleaned brush on newspaper. Then wave it or spin it to remove excess paint and solvent. You can do this by hand or with a spinning tool. In either case, be sure to spin the brush so that the spray lands inside a bucket or trash can.
Wrapping and storing brushes
1. Wrap the brushes
When the brushes are clean and dry, wrap them in heavy brown paper or newspaper so that the bristles remain straight. Secure the paper with a rubber band or tie with string.
2. Store brushes properly
Store brushes by placing them on hooks so that their bristles hang free. You may have to drill holes in the handles. If you are storing a number of brushes, label the wrapping with the size of each brush.
Cleaning and storing rollers
1. Clean rollers with solvent
Pour solvent into a cleaned-out roller tray and submerge the roller cover. Wear gloves and use a 5-in-1 tool to rub the paint out of the cover. When the cover is clean, squeeze it out and rinse it in clean solvent. Stand the cover on its end to dry.
2. Wrap rollers for storage
Wrap the rollers loosely in plastic or heavy brown paper. Secure the paper by twisting the edges of the wrapping.
Storing paint
Paint that is sealed and stored properly will, after a little stirring, be ready to use years later. At the end of a project, combine all of the leftover paint of the same color into as few cans as possible. If you cannot read the label because paint has dripped over it, write the color and sheen on a stick-on label and put it on the can lid.
Most paint labels provide information on storage. In general, place the paint in an area where it will not freeze and where children and pets can’t get at it. A paint-storage cabinet that can be locked is the best place to keep old paint.


Disposing of paint
Small amounts of water-based paint can be poured into an absorbent material, such as shredded newspaper or cat litter, then placed in the trash. Recycle the rinsed-out cans.
Oil-based paint cannot be thrown out with the trash, as it is considered a hazardous substance. Make inquiries at your town maintenance department about how to dispose of the paint. It may be possible to donate leftover paint to charitable groups.
Disposing of solvents
The solvents used for oil-based paints are hazardous and should be stored out of the reach of children. It is a good idea to recycle solvents for future use.
1. Pour solvent into a container
Pour the used solvent into a clean container. You may need a funnel. Close the lid tightly and leave the solvent for a few days to allow the paint particles to settle at the bottom of the container.
2. Decant the reusable solvent
When the used solvent has separated out, the clear, reusable liquid will settle over the paint particles. Carefully pour the clear liquid into another container with a lid and save the solvent for another painting project.
3. Dispose of the solvent residue
Add cat litter, sawdust, or any other absorbent material to the paint residue in the first container. Call your town maintenance department for information on how to dispose of unwanted solvents.
Seal the paint can
Remove paint from the groove on the lip of the can with a brush or rag. Place the original lid in position. Protect the lid with a rag while you use a hammer to seal it.
Care and maintenance
Regular cleaning will keep painted finishes looking like news. Surfaces with glossy sheens can be cleaned with soap and water, while duller surfaces should be dusted. Clean spots from flat or eggshell walls and ceilings with warm water. If that does not work, consult the manufacturer for instructions.
Keep a record of your paint jobs and the paint manufacturers’ phone numbers so that you can get in touch with them, if needed. The record should also tell you the exact shade used during a project, how much paint the job required, and even how long it took to do the job. This is all valuable information when you decide to repaint the room.
Paint touch-ups
You can repair any nicks and chips in a pint finish by touching up with the original paint. Use as small a brush as possible to apply the paint. If the touch-up dries differently from the original paint, you may have to repaint an entire section of surface. For example, if you make a repair, it may be necessary to repaint part of the wall or a section of woodwork so that the repair does not stand out.
Maintaining floors
Use a dust mop or a vacuum with a wood-floor attachment to keep the surface of hard floors free of dirt. To remove stains, use a cleanser that is made for the type of surface finish that you applied. Restore the shine by buffing the surface with a lamb’s wool pad.
When buffing no longer revives the floor, apply a new coat of finish. For polyurethanes, clean the floor and dull the existing finish with steel wool, a sanding screen, or sandpaper. Then apply the new finish in thin coats. Allow each coat to dry, as stated in the directions, before recoating.
